A faster way to analog layout design
This article is based on a free webinar you can find here.
Can you automate analog layout placement?
Over the years, there have been several attempts to automate analog layout. Digital layout has achieved automation for all aspects of their design, while analog still relies on manual placement. At Pulsic, we have developed a tool that can be embedded in your schematic editor, which successfully automates up to 60% of your design: Animate Preview.
What is Animate Preview?
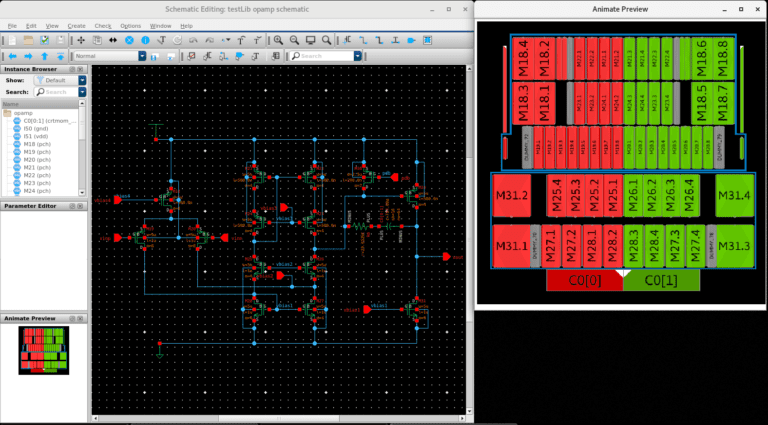
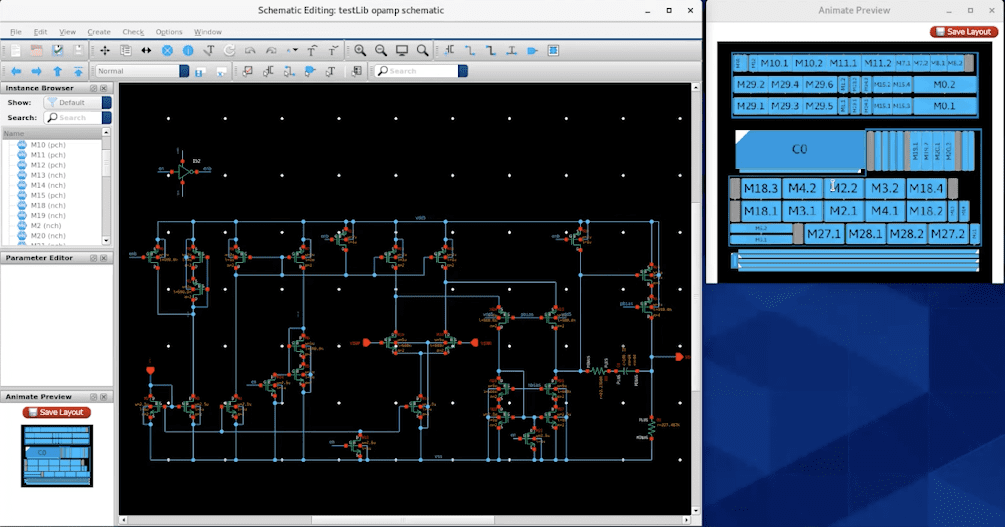
Animate Preview is an assistant window in your schematic editor. It pulls the schematic from the Open Access database and loads all the Pcells, and the technology that you usually use from that Open Access database. Animate understands your circuit and looks out for common analog structures, such as current mirrors and differential pairs.
Once installed, you can immediately cross probe your schematic with this new preview. If you select instances in the schematic, you can see they are selected in the layout. All your devices, differential pairs, current mirrors have been placed by Animate in the initial layout.
As you open your schematic editor, Animate creates a preview on the left bottom corner. By double-clicking it, you can obtain a larger preview.

Create 60% of your layout faster
The idea of Animate is to generate a 60% complete layout. The resulting layout is fully customizable to the users’s liking. There is no need to return to your layout editing tool. By right-clicking the preview window, you can open the Animate GUI to customize your layout. Unlike a typical schematic editor, Animate’s editor works at a high level of abstraction. You can do high level changes to the order and the structure of the floorplan, while Animate’s editor takes care of DRC, the constraints, the polyheads and the guard rings.
3 easy ways to customize your layout from Animate’s GUI
1- Change the number of rows for your matched structures.
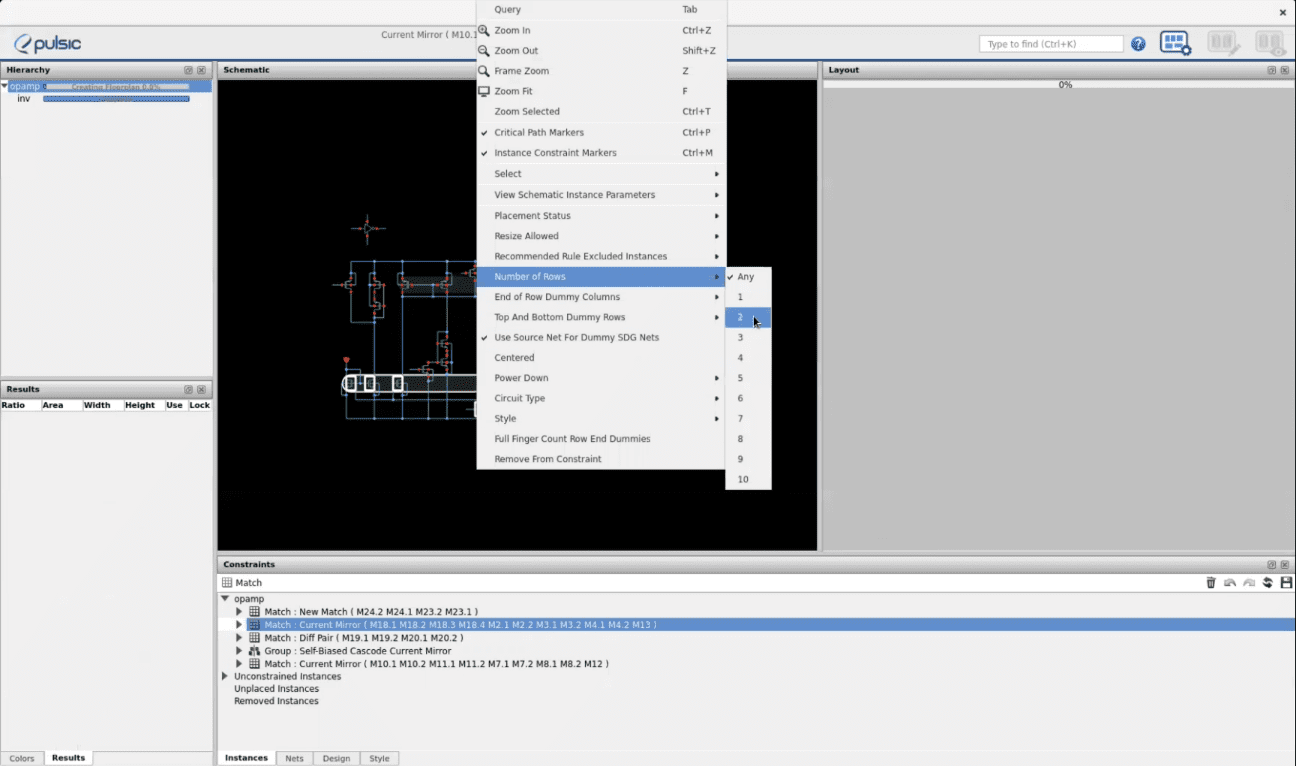
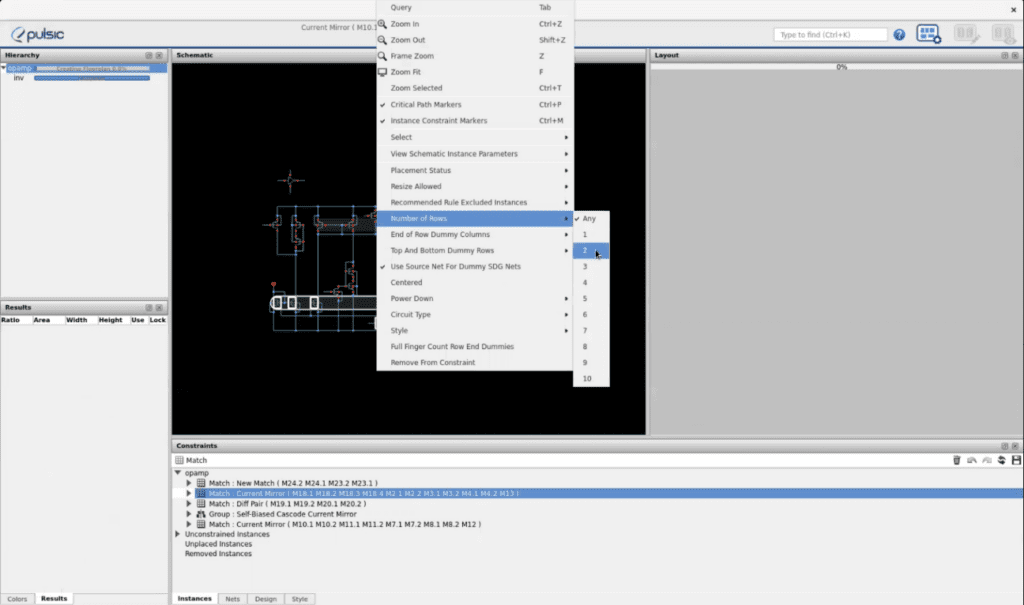
Animate will do what is best for the area and the wiring of the circuit. However, we may have other requirements. In Animate, we are going to specify that we prefer two row results for the pmos current mirror, using our constraints tab.
First, we select the current mirror and right-click on it to bring up the menu. We can then change the number of rows from ‘Any’ to ‘2’. The same can be applied to the nmos current mirror.
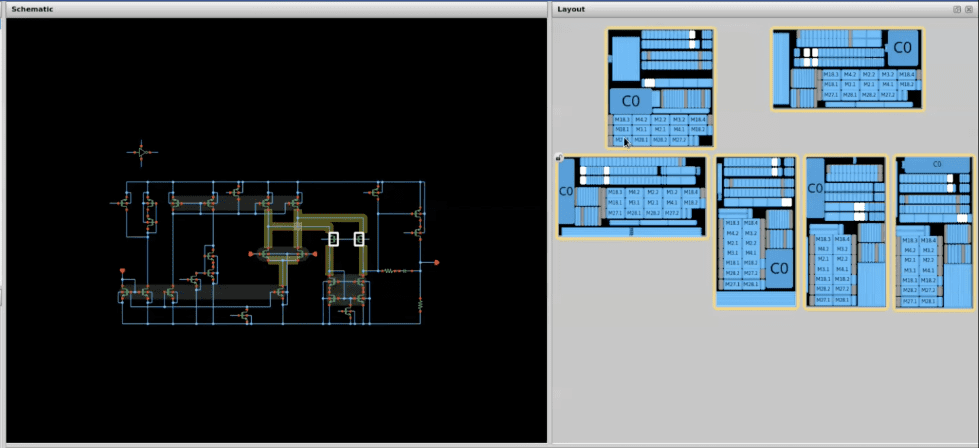
Animate will then produce a new set of layouts that obey these stricter constraints and show them in our wall. All the results will be DRC clean.

2- Match structures so they can be placed together.
On our wall, we can see that there are two devices that Animate has put together on some layouts but have been separated on others. As there is no match constraint, Animate is doing what is best for the area and general wire length of the circuit. By changing the constraints inside Animate, we can get the results that we want.
We can select the devices and click ‘Match’ on our Constraints tab. Animate will automatically create the constraints and place the devices together.

3- Change the guard rings
Another example of the high level of abstraction would be guard ring management. We can see that Animate has created a single guard ring around the outside of our nmos current mirror. Let’s say we want to reinforce this guard ring, so we want the guard ring not only below our current mirror, but also above it.
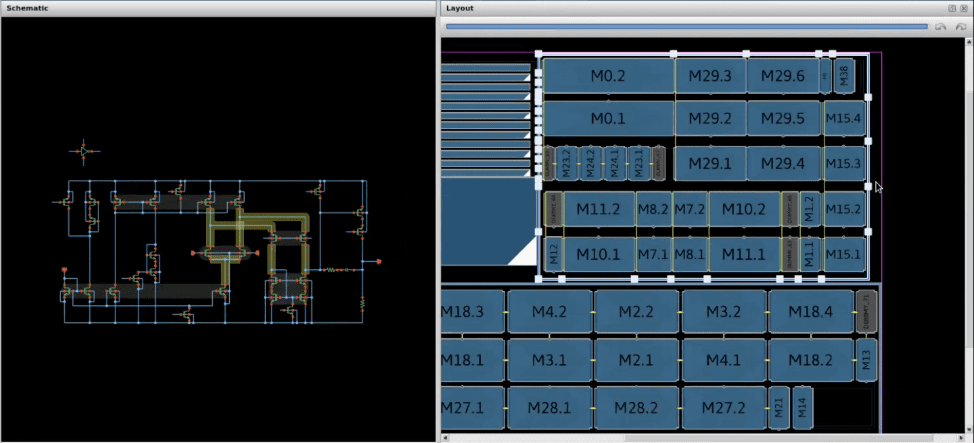

As we hover above our layout we can select the guard ring handles that have appeared. If we click and drag, we will get a guard ring bar attached to our cursor, allowing us to take it through the guard ring handles that appear at the junctions of the transistors and making a new path.
After that, the DRC mechanism will spread the devices apart, to get us back to a DRC clean layout. This will take just a few seconds or up to a minute depending on the size of the circuit.
Now we have the reinforcement that we wanted and we can continue to make changes in this way.

